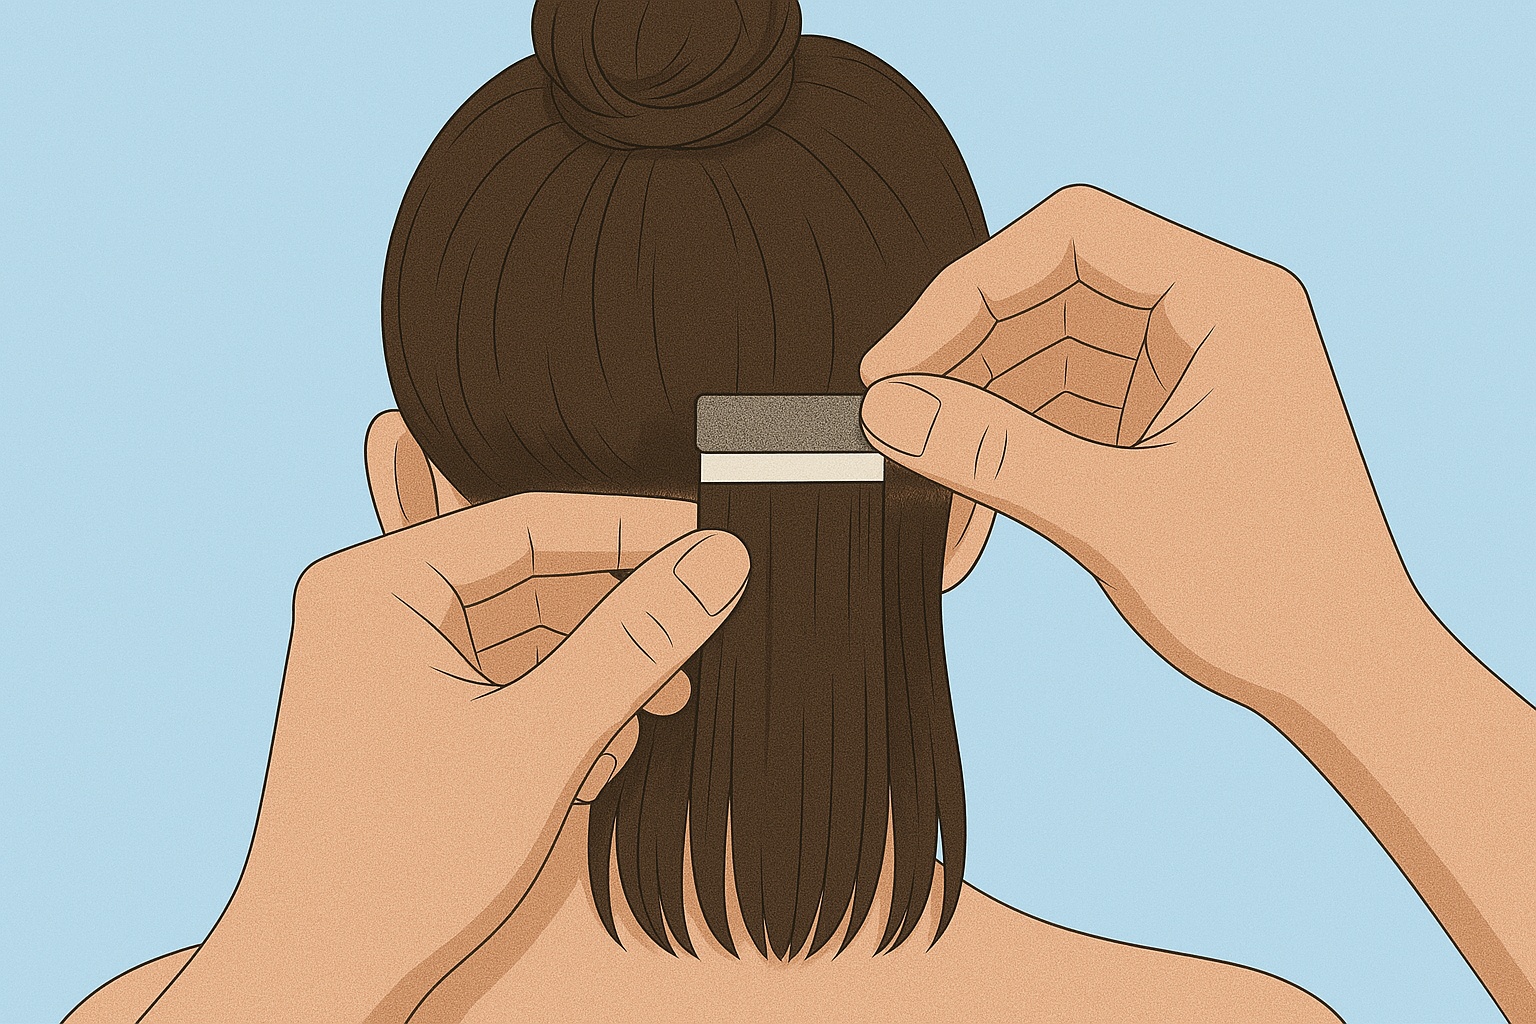
Clip-ins are temporary hair extensions that add length to natural hair. If it is your first time installing this type of hair extension, we have compiled a detailed guide below on how to place clips in hair extensions. One of the many benefits of choosing clip-ins is that they require no commitment.
You can wear them for a special occasion and remove them afterwards to keep your natural look. This is why you need to know how to put in clip-in hair extensions to change your hairstyle anytime, anywhere easily.
Tools needed for placing clip-in hair extensions
Here’s what you’ll need to install clip-in hair extensions:
- A hairbrush to detangle both the natural hair and the extensions.
- A rat-tail comb for making clean, even sections.
- Hair clips to keep your hair out of the way while you work.
- A mirror to help you check alignment and placement.
- A heat protectant is needed if you intend to do some heat styling.
Most clip-ins come in sets. A common type is the 7-piece clip-in extension, which includes wefts with 1 to 5 clips. The wider pieces (like 4 or 5 clips) go along the back for volume, while the smaller ones (1 or 2 clips) fill in the sides or thinner spots. Knowing how to put in 7-piece clip-in extensions allows for better placement.
You can check out all you need to know about “Clip-ins hair extensions”.
Step-by-step guide to applying clip-in hair extensions
Clip-ins differ from the other hair extension comparisons in many ways. So, how do you put clip-in hair extensions? You can successfully install the wefts within a few minutes.
Step 1 – Preparing your hair
Before reaching for your clip-in hairpieces, start with clean, tangle-free hair. This step matters more than most people think. Oily or knotted hair makes it harder for the clips to grip, which affects the hold. When washing your hair, use products that suit the texture of your natural hair, then either air dry or use a low-heat dryer. Once the hair is dry, brush thoroughly from the ends to the roots to remove any knots.
If you skip this step, the extensions may slip or look uneven. Even though clip-ins are temporary, how you prep your hair sets the tone for how natural and secure the final style looks.

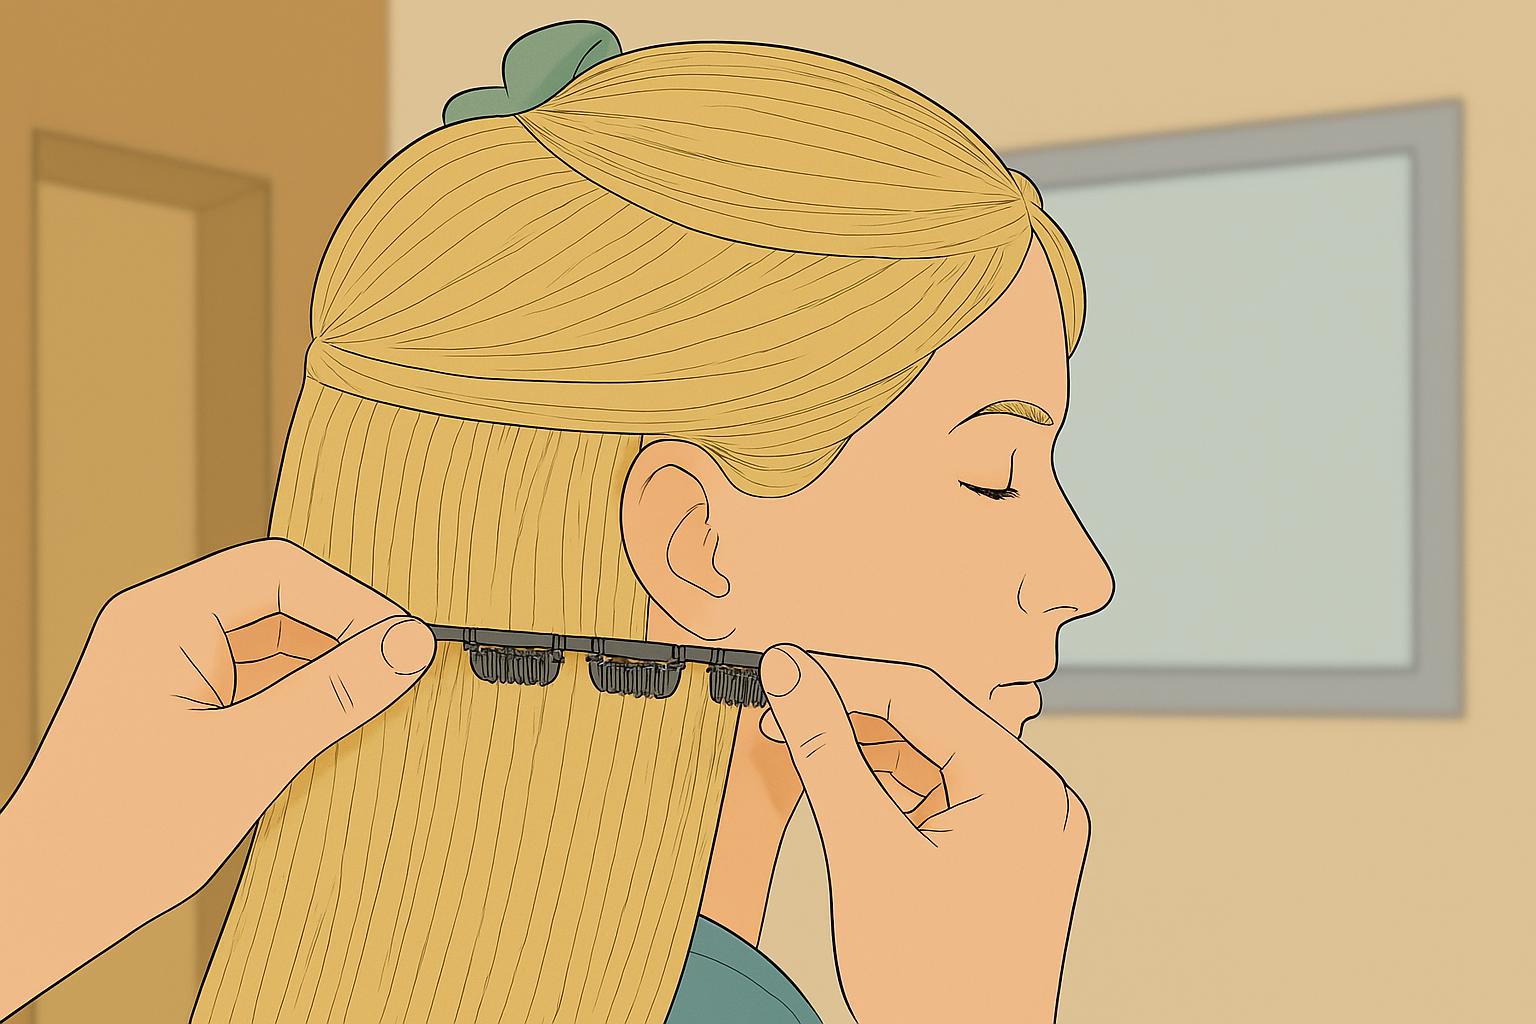
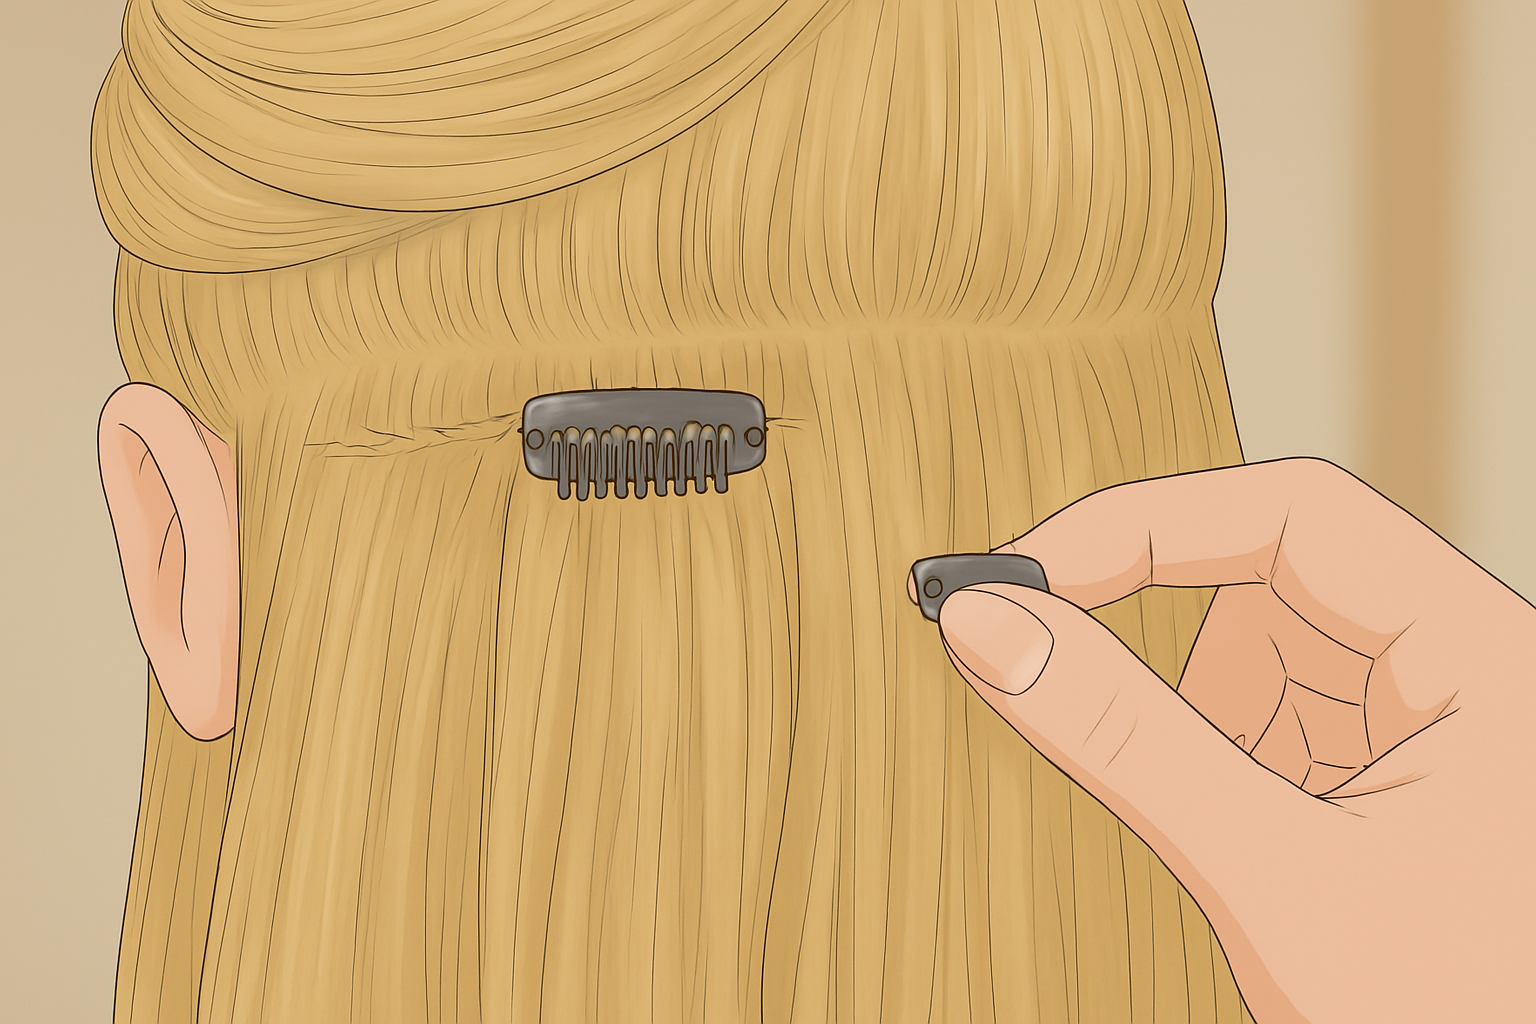
Step 2 – Attaching the first weft
Start by creating a horizontal part just below your ears. Clip the rest of your hair up, then grab a 3-clip weft and brush it gently from ends to clips to remove tangles. You can position the weft under the part you created while keeping it about an inch from your hairline.
Next, secure the middle clip first as you press it close to the roots. Then, part the side clips into place, ensuring that the weft lies flat and snugs without pulling at your scalp. This method keeps the extension secure and natural-looking. Check in the mirror to avoid bumps.

Step 3 – Adding more wefts
The goal is to create another part about 1 to 2 inches above the first, which should line up around the middle of your ears. Use your rat-tail comb to make the part neat, then clip the upper hair.
The next step is to pick a 4-clip weft and brush it gently to remove tangles. Knowing how to insert clip-in extensions properly means paying attention to how the wefts sit.
Start by clipping in the middle clips close to the roots, then work out to the sides. This section usually holds one of the longer pieces, so you should get it right with proper balance and blending.
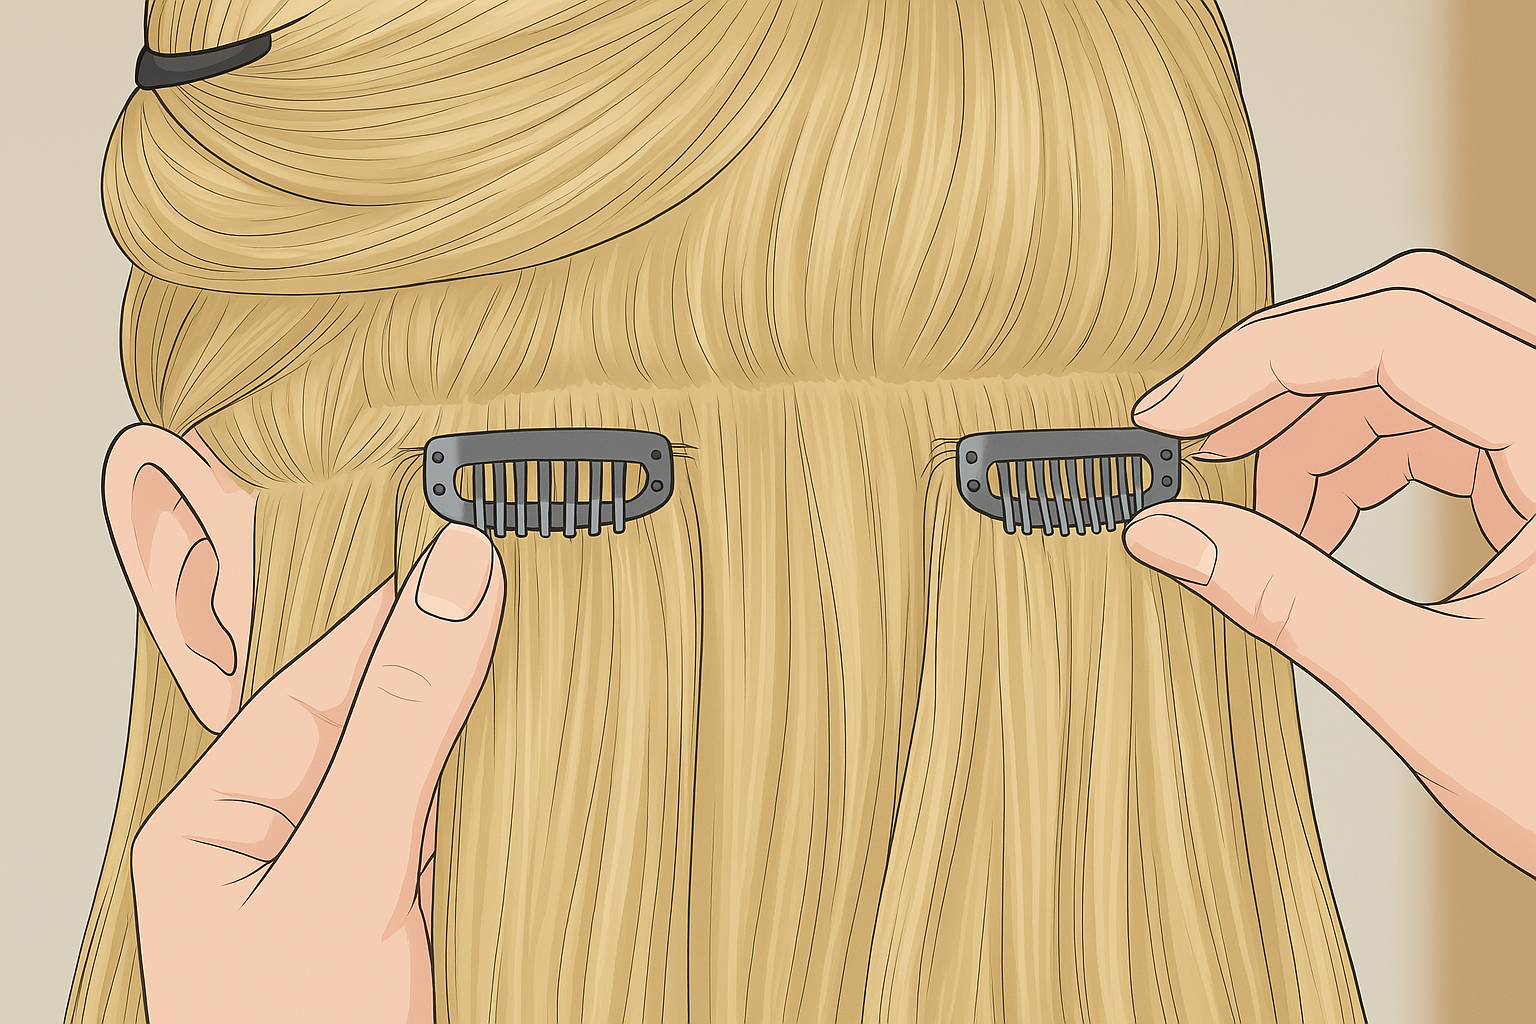
Step 4 – Adding side pieces
Part your hair about 2 inches above your left ear using the tip of your comb, and clip the upper hair aside. You should then take a 2-clip weft, brush it smoothly, and place it about an inch back from your hairline.
Proceed to clip in the middle first if it helps with control, then secure the second clip. Repeat the same steps on the right side. If placed correctly, they will move with your natural hair and disappear in the layers.
Step 5 – Fill in thin spots with 1-clip wefts
For areas that still look sparse, especially just above the side pieces, 1-clip wefts in hair extensions can help to even things out. These single-clip wefts are perfect for filling in thin spots without adding bulk.
Before placing them, feel around your head to make sure you are not clipping too close to an existing weft. These little pieces are ideal hair extensions for thin hair because they offer a light, natural boost where it is needed the most. Use as many as you need for balance, but be careful not to overload.
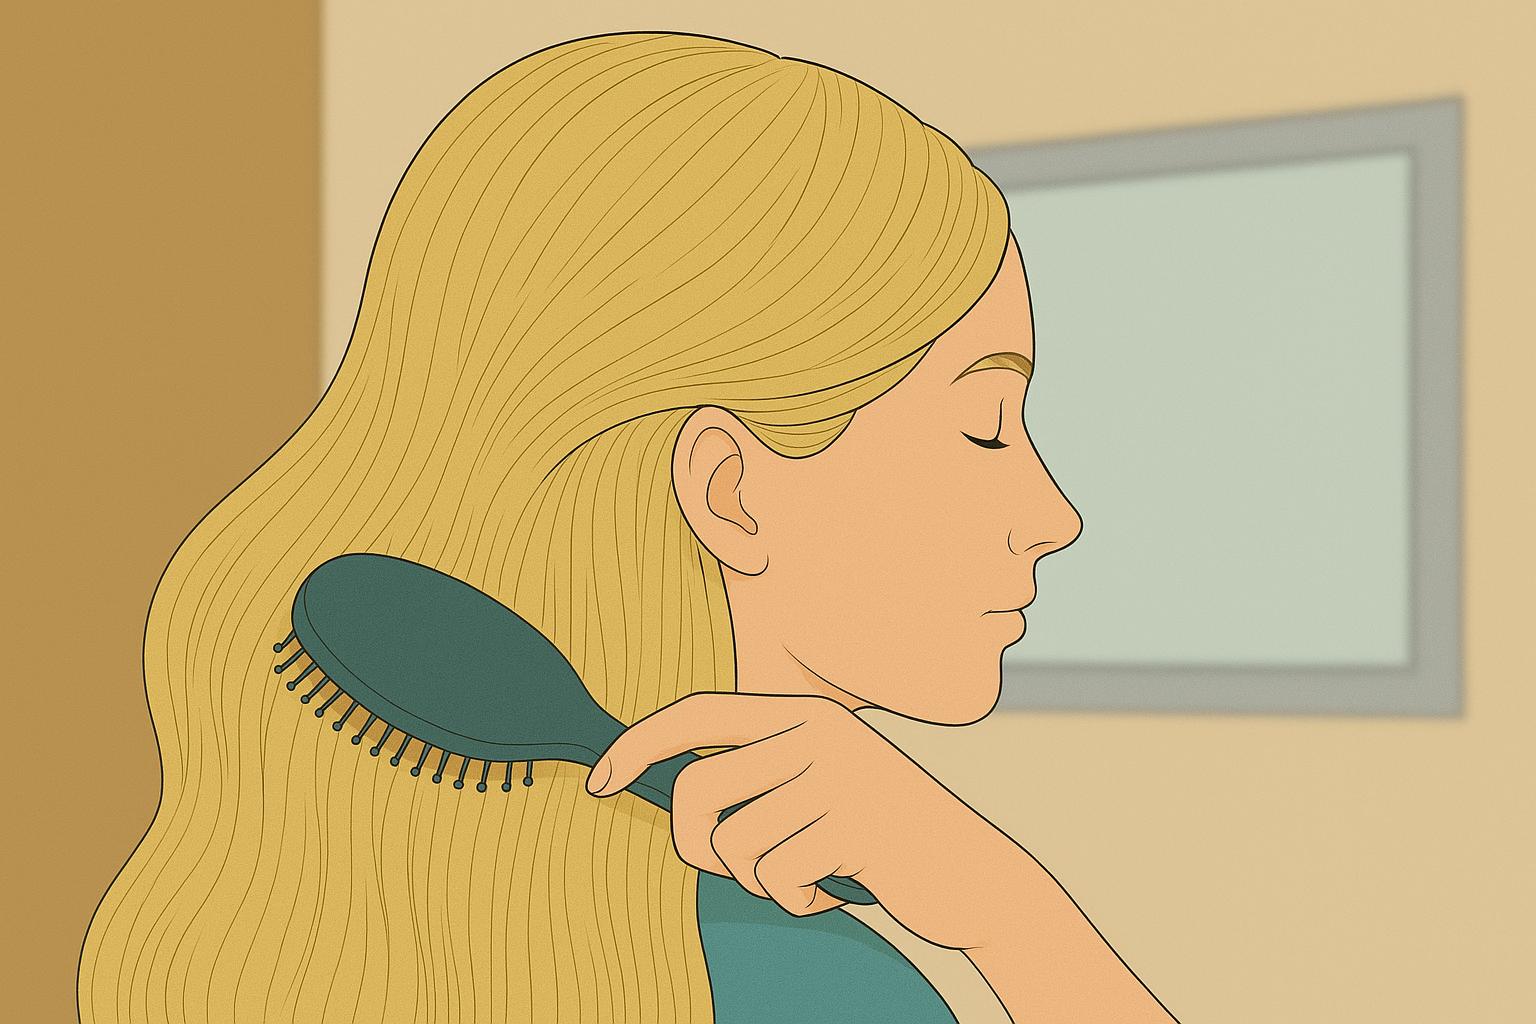
Step 6 – Blending for a natural finish
Once all the wefts are in, unclip the rest of your hair and let it fall over the extensions. Use a soft brush to style your natural hair with the added pieces, brushing from the ends upward. This step helps everything flow together and prevents visible wefts.
Depending on your desired hair extension styles, you can try some curls or waves, especially if your hair has a natural texture.
Tips for a natural look with Clip-in hair extensions
Having discussed how to use clip-in hair extensions, you may also want to know how to keep your clip-ins looking natural. Here are a few things to keep in mind:
- If your hair is short, make sure the ends fit into your natural cut. You can achieve this by trimming and layering the extensions after clipping them.
- Go 1 to 2 shades lighter than your natural hair if you are considering an Ombre effect.
- Make sure that the wefts are positioned below the eyebrow level to ensure there is enough hair to cover them.
- Stick to a regular hair extension maintenance routine. For instance, wash your hair extensions after 10 to 15 wears.
Common mistakes to avoid when placing clip-in hair extensions
While installing your clip-ins, there are many things that could go wrong. Below is a list of the mistakes you need to watch to avoid damaging your natural hair or the extensions themselves:
- Clipping the wefts is too high. This makes it harder to hide.
- Using too many pieces. This may cause overloading, which could cause the clips to slip.
- Failing to brush or dry your hair properly.
- Choosing the wrong styling products. Pick a light shampoo for hair extensions to prevent slippage.
- Rushing the process. Ensure you know how to apply clip-in hair extensions correctly to prevent visible gaps and uneven volume.
If you need professional help with your hair styling goals, our team at Lady And The Hair is ready to help. Contact us to speak with one of our hair stylists, who will listen to your needs and suggest the best course of action.